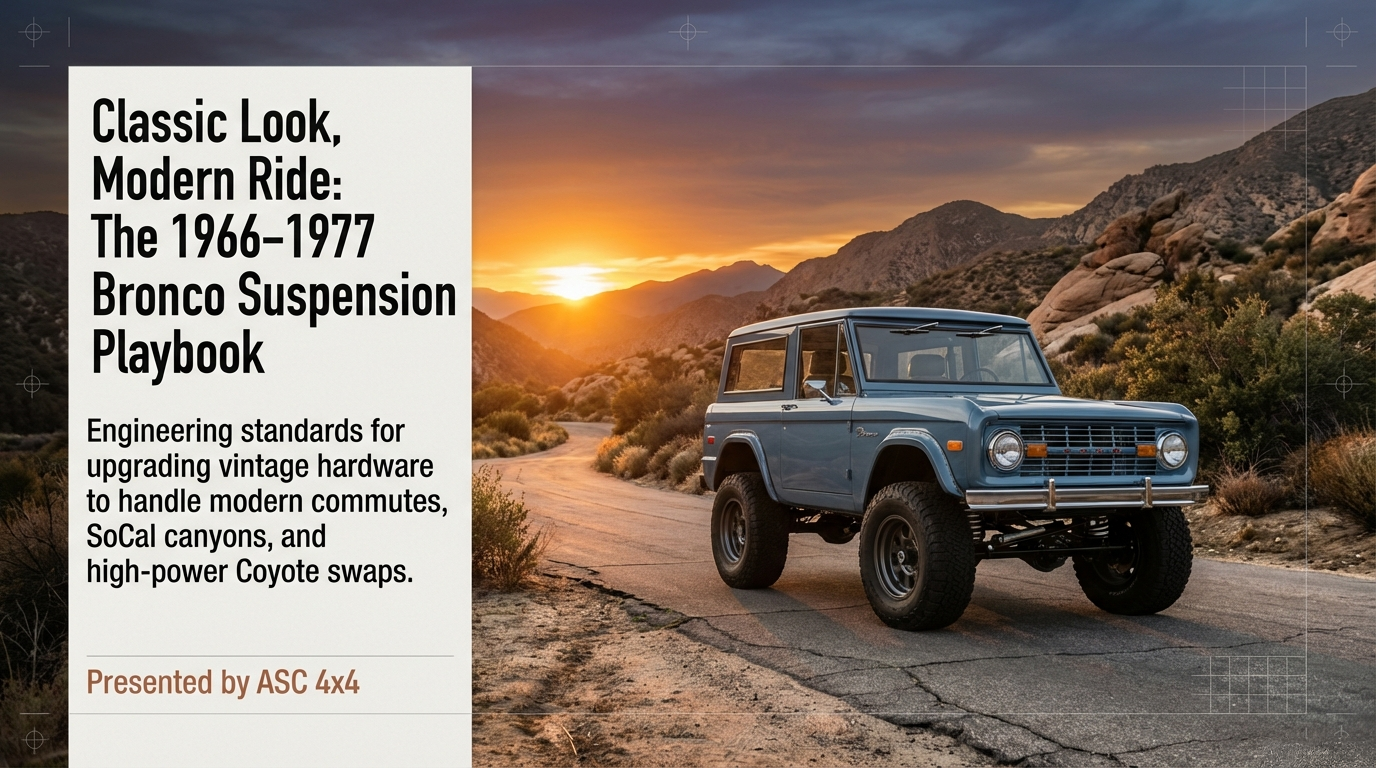
 The first-generation Ford Bronco was built for utility, but the early Bronco suspension components from 1966–1977 were never designed for freeway miles, SoCal canyon curves, or modern braking demands. Most original coils, leaves, and shocks survive only as tired hardware that transmits corrugation, brake dive, and body roll straight through the cabin. The good news is that replacement components, valved shocks, and updated geometry can give you a confident, premium ride without turning the truck into a caricature.
That’s why the right early Bronco suspension strategy matters before you drop cash on wheels, seats, or a powertrain. By focusing on fit-on standards—frame prep, geometry, damping, and alignment—you keep the vintage sheet metal intact while delivering a new level of composure. Snappy handling is the baseline; comfort and quiet on daily freeway blasts are the reward. A modern lift kit, when sourced and installed correctly, becomes a seamless layer that links the axle to the road, not a sacrificial altar for rattles and rubs.
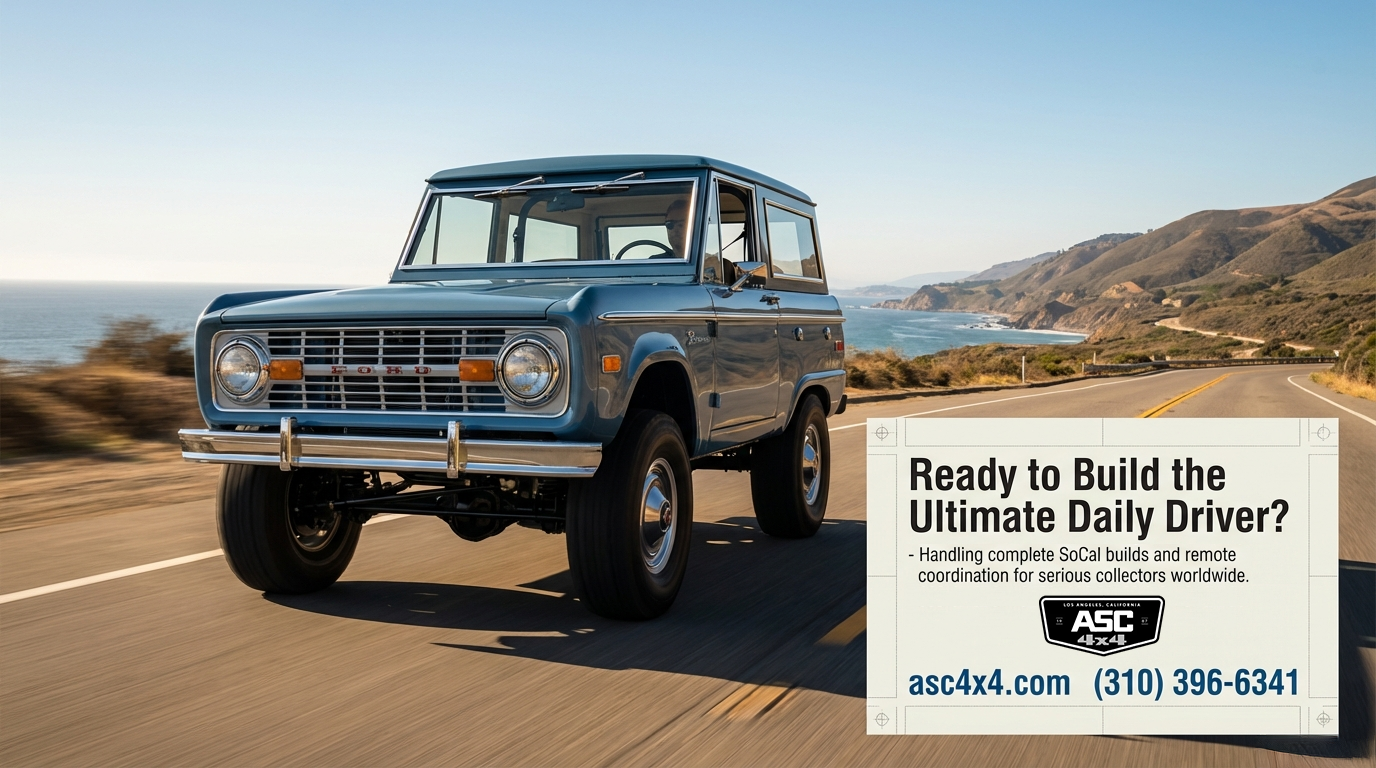
ASC 4×4 delivers this balance every day in our LA shop, handling SoCal builds and remote consultations for collectors and daily drivers alike. This guide records the standards we follow, the mistakes we avoid, and the decisions we ask owners to make before upgrading their suspension.
Why Modernizing the Early Bronco Suspension Still Matters
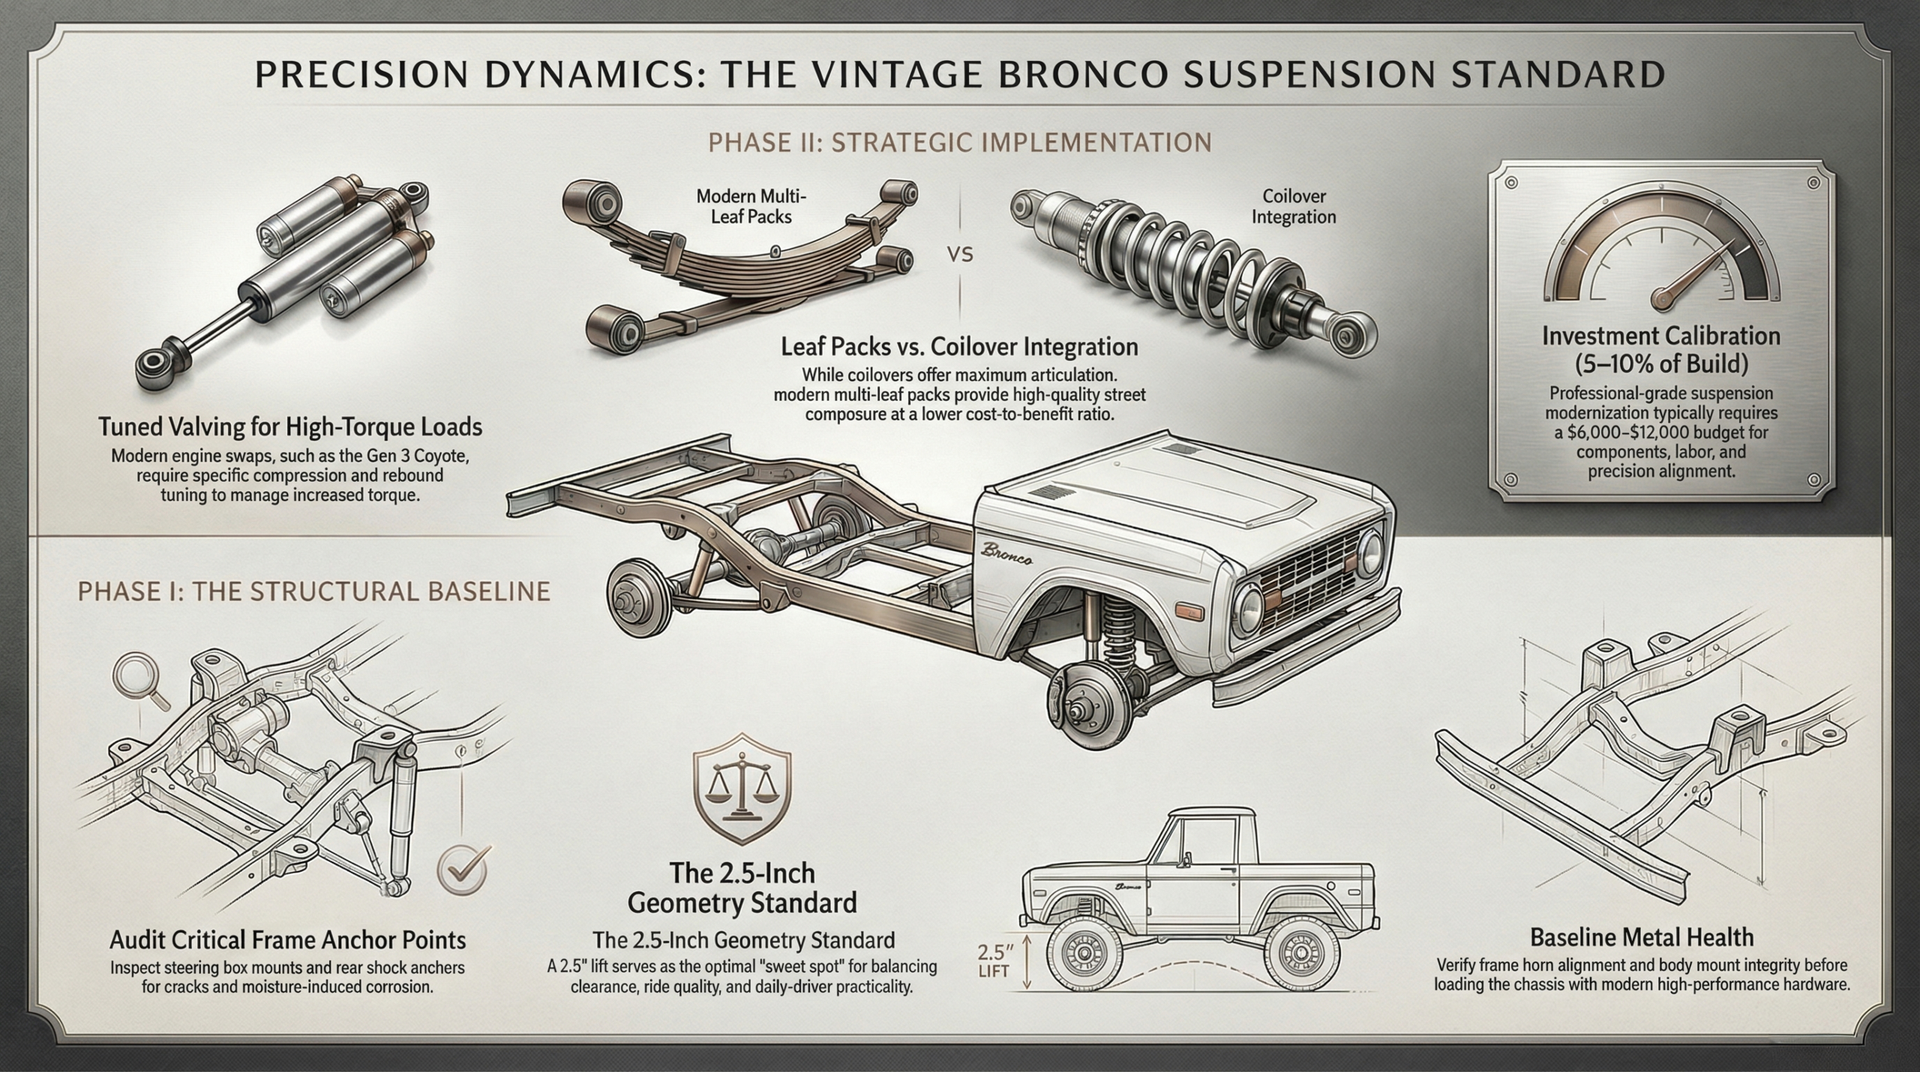
The factory coil-front, leaf-rear layout had enough travel for trails, but the bushings, shocks, and sway bars were sized for 1970s horsepower and drum brakes. Today, you can expect an increase in curb weight after drivetrain or power upgrades, and the old early Bronco suspension setup simply doesn’t control pitch, dive, or body roll. Upgrading to modern coilovers or multi-leaf packs with tuned valving restores contact patch control, reduces brake dive, and lets you rein in the truck’s lively weight transfer.

Modern kits also include features that the factory never offered: dampers with compression and rebound tuning, preloaded coil springs for consistent ride height, adjustable track bars to correct axle alignment during lift, and sway-bar kits that keep the nose from wandering on the freeway. These are the same traits borrowed from premium 4×4 chassis programs that let a Bronco ride like a modern SUV while keeping steering smooth and predictable.
Baseline Inspection: Early Bronco Suspension Health and Geometry
Before bolting anything on, inspect the Bronco like a doc checking vitals. That means:
- Steering box mounts and frame rails—the most common crack points caused by worn-out, overspecced boxes.
- Rear axle bump stops to body mounts—these frame rails trap moisture and usually hide rust in patchy paint.
- Rear shock mounts—rust can eat the anchor point from beneath; probe with a screwdriver.
- Body mount holes and pad areas—if the bodies sag here, your suspension will never settle equally.
- Door posts, hinges, and body gaps—to know how much shim or filler you’ll need before you match the new stance.
- Frame horn and crossmember condition—bent or repaired horns should be straightened or replaced before loading with modern shocks.

A thorough inspection avoids the mistake of spending on a kit only to discover a rotten frame or misaligned body that pushes the axle sideways. Document each measurement and photo so you know whether to replace gauges or retro-fit new sheet metal before the early Bronco suspension touches it.
Define Your Early Bronco Suspension Ride Target
Are you logging 60-mile commutes on Pacific Coast Highway, towing a trailer down to Baja, or showing the truck at a weekend meet? Daily-driver upgrades only work if you choose components that match your use-case:
- Commuter focus: Soft valving, OEM-style springs, and a lower lift (0–2″) keep NVH at a minimum while the sway bar keeps the nose flat on highway on-ramps.
- Balanced street/trail: A 2.5–3.5″ lift with adjustable coilovers and twin-rate springs preserves clearance while letting you dial in damping for road comfort on weekdays and articulation on weekends.
- High-power setups: If a Coyote swap, Coyote-boosted 302, or 351 comes next, plan early Bronco suspension upgrades that can handle another 100+ lb-ft of torque without compressing the front coils or beating the mounts.

Setting a goal now determines whether you match the shocks with the coil or leaf spring rate, and whether you need additional components such as drag-link drop brackets, extended brake lines, or anti-sway bar end links that survive a lifted front end.
Early Bronco Suspension Component Selection and Budget Worksheet
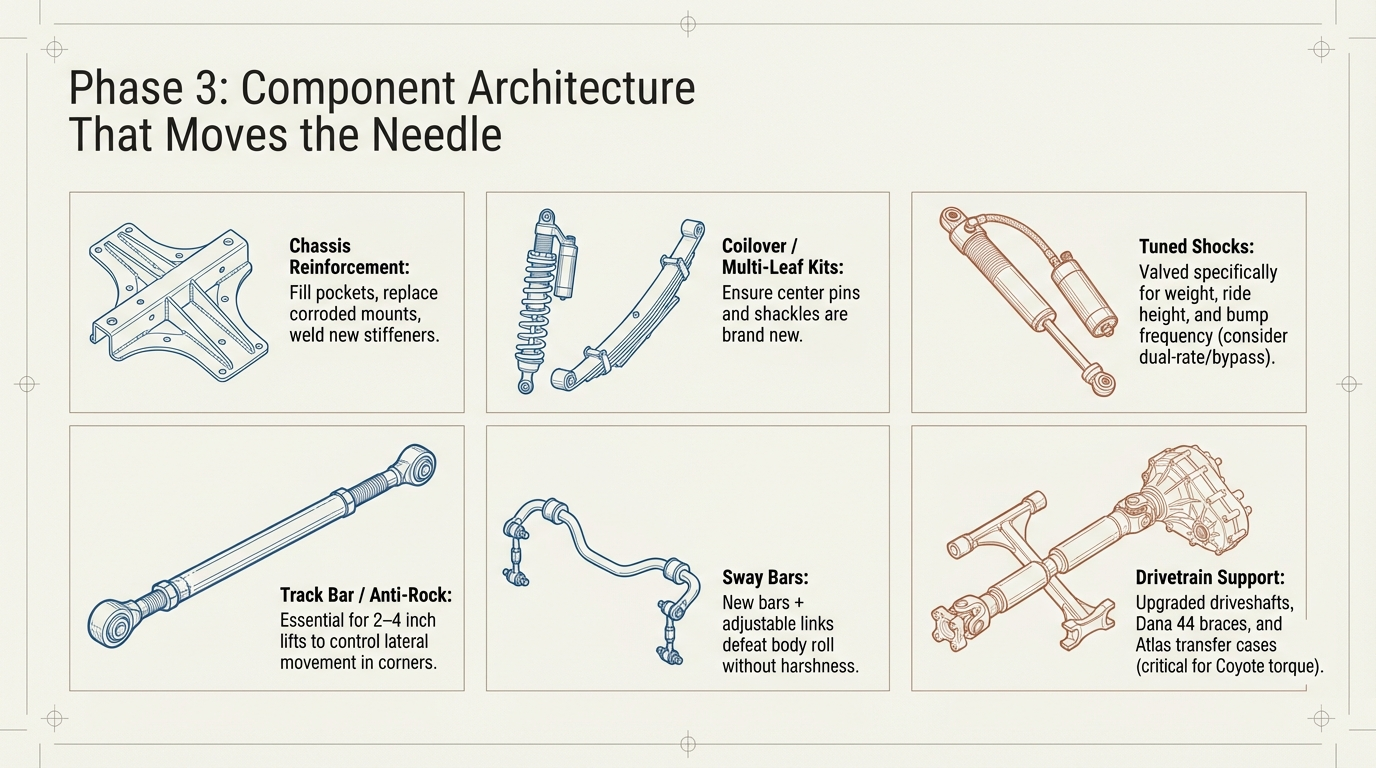
Components That Move the Needle
- Chassis reinforcement and plate repairs: fill pockets, replace badly corroded mounts, and weld in new stiffeners before installing modern hardware.
- Coilover or leaf spring kit: pick a reputable kit (coilovers for max articulation, multi-leaf packs for long travel) and make sure center pins and shackles are new.
- Shocks: valved for your weight, ride height, and bump frequency. Consider dual-rate or bypass for heavy-duty use.
- Track bar/anti-rock: essential for 2–4″ lifts to control lateral movement during cornering.
- Sway bars: new bars and adjustable links defeat body roll without making the ride harsh.
- Alignment tools and labor: corner balancing, toe-in, and caster must be rechecked after new springs.
- Drivetrain support: heavy torque from a Coyote demands upgraded driveshafts, Dana 44/differential braces, and possibly an Atlas transfer case to keep the axles from dragging on the modern suspension.
Coilovers vs. Stock-Style Early Bronco Suspension
Coilover suspensions look cool and offer a slightly better ride than stock setups, but we don’t push them unless a customer specifically demands it. Not enough benefit for the additional cost. You can still maintain leaf and coil spring suspension with stock-style shock options and achieve a really good ride—especially with a Coyote swap or 302/351 engine option where the right valving makes all the difference.
Early Bronco Suspension Lift Height and Geometry
With the proper components available in the market, you can maintain proper geometry with any suspension lift. However, we recommend staying with nothing higher than a 2.5″ suspension lift, especially with a Coyote swap since the required body lift will add overall height. Higher lifts are possible with the right components, but the 2.5″ sweet spot balances clearance, ride quality, and practicality for daily driving.
Budget Worksheet
| Line Item | Details | Range |
|---|---|---|
| Inspection & prep | Frame rust repair, body mount shims, hinge checks, panel-gap tweaking | $800–$1,600 |
| Coilover or leaf kit | Includes springs, track bar, bushings, and modern mounting plates | $1,600–$3,200 |
| Adjustable shocks | Valved monotube, twin-tube, or remote-reservoir units matched to ride height | $1,200–$2,000 |
| Alignment + corner balancing | Alignment shop time, spool torque, and ride-height tuning | $500–$1,200 |
| Add-on hardware | Sway-bar end links, bump stops, reinforced mount plates, brake line extensions | $600–$1,200 |
| Labor/package add-ons | Install + pre/post test drives (in-house or pro shop) | $1,200–$3,000 |
| Total | + any engine/drivetrain watch list | $6,000–$12,000+ |
These ranges tie into the broader restoration investment buyers referenced elsewhere; good code for cost-of-ownership is $50K–$150K for a finished Bronco, so suspension upgrades represent about 5%–10% of the spend if you’re aiming for showroom-grade ride quality.
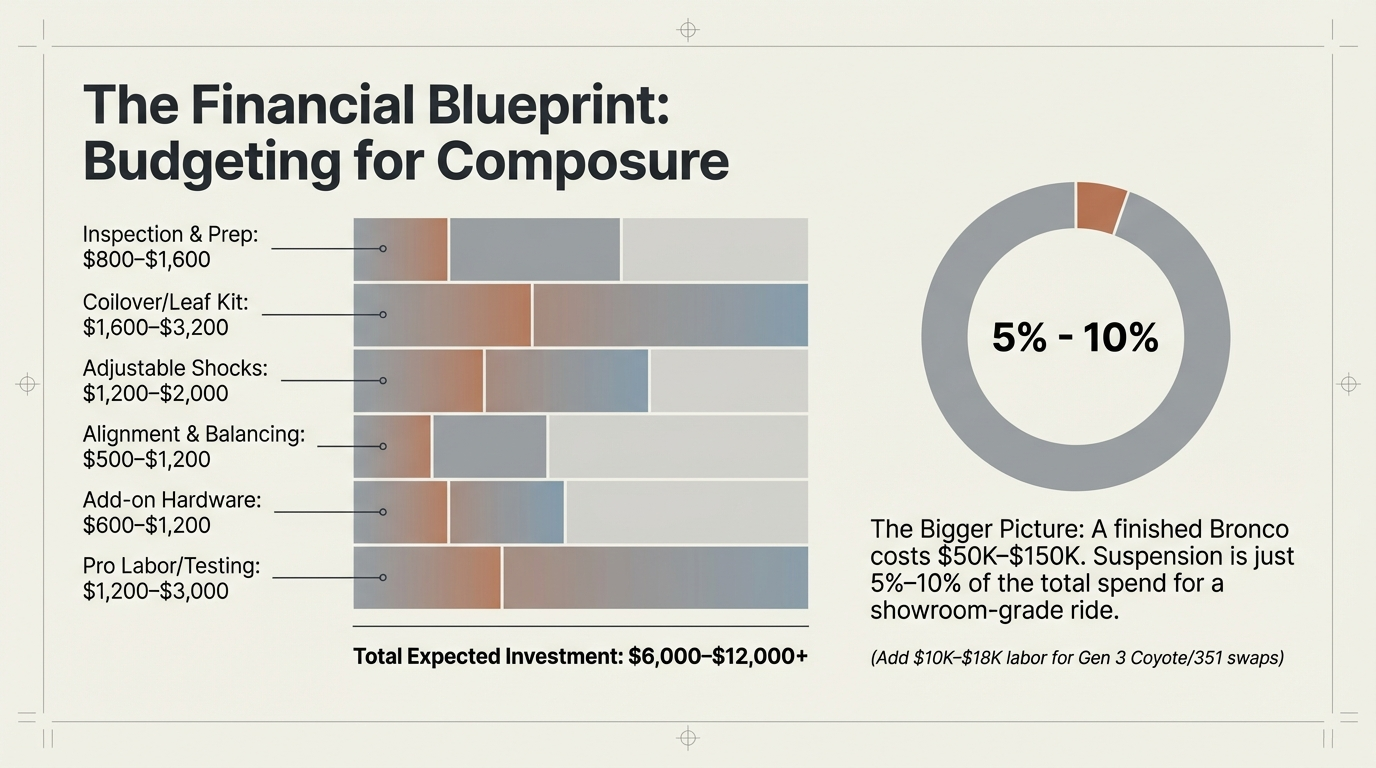
If you also plan to swap a Gen 3 Coyote or a high-output 351, add another $10K–$18K for engine/transmission install labor and ensure your early Bronco suspension plan ships the torque without compressing the coils or knocking loose brackets.
Decision Guide: DIY vs. Pro vs. Hybrid for Early Bronco Suspension Work
| Path | Pros | Cons |
|---|---|---|
| DIY | Full control, potential savings, knowledge of the truck | Risk of misalignment, floorboard rust missed, takes weeks/hours of shop labor |
| Pro shop (ASC4x4) | Certified alignments, documented standards, torque reports | Higher cost, scheduling lead time, relies on remote coordination |
| Hybrid | Use pro-level jig/align service after DIY install, low cost for installation but safe final check | Still requires transportation to pro shop for verification |
When to choose pro: you’re installing high-power drivetrains (Coyote 5.0 or 351). When to choose DIY: you already own the Bronco, have a well-equipped garage, and plan to install minor lift components. Hybrid path: install coilovers or leaf kits yourself, then hand the truck to ASC for alignment, QA ride height, and verifying that bushings tilt correctly.
Alignment, Tuning, and Maintenance After Early Bronco Suspension Installation
Post-install, corner balancing is non-negotiable: check caster, camber, toe, and ride height at each wheel to ensure the kit isn’t inducing steer pull or premature tire wear. Track bars must be re-centered and torque-sequenced after a final test drive. Worn ball joints, tie rods, or strut rod bushings amplify error—replace them when swapping springs to avoid running misaligned geometry into the turned wheels.

Plan a suspension service after the first 500 highway miles: retorque the mounting bolts, inspect the shocks for leaks, and recheck sway-bar link length (might settle after the first flex). Shocks built for daily use often require re-valving after the initial break-in, and leaf packs may need a helper spring or bushings swapped when you add rider weight (passengers, gear, or a tow hitch). Keep a log of what pads, shocks, and bushings are replaced so future owners can see the same standards you do.
Common Early Bronco Suspension Mistakes
- Ignoring frame/high-mount rust before installing new suspension components; the new kit simply wears through thin steel.
- Assuming the stock shocks will work with a bigger sway bar or lift; mismatched valving makes the ride wallowy.
- Choosing lift height based on looks instead of functional clearance, leading to rubbing or binding at full droop.
- Leaving wheel/tire offset unchanged after adding 3″ of lift—you need to recalibrate toe and track width in tandem.
- Overlooking drivetrain upgrades after a Coyote swap, letting the Bronco beat its new-upholstered suspension with extra power.
ASC Standards for Daily-Driver Early Bronco Suspension Builds
- Documented pre-work inspection of body mounts, hinges, and frame horns before touching the suspension.
- Torque-controlled installation of shocks and springs with both methacrylate and charted specs.
- Multiple alignment pass-throughs (initial, post-fitment, post-test drive) with data logged in the job card.
- Ride-height and corner balance note in the handoff package so the owner can replicate the setup after future maintenance.
- California-based builds get a final walk-around with remote photos/videos for buyers outside SoCal.
FAQs
Can I keep stock leaf springs and just swap the shocks? You can keep the leafs for mild applications, but they should be fresh, matched, and mounted with new bushings; shocks must be valved for the heavier ride height to avoid uncontrolled rebound.
What’s a reasonable budget for a full early Bronco suspension refresh? Expect $6K–$12K for kit, shocks, and labor, plus additional costs if rust repairs or a Coyote swap are in the mix.
How soon should I realign after installing a kit? Align immediately after the install, then recheck after the first 200 miles and again after the first track-off-road weekend; bolts can settle and bushings seat.
Does a Coyote swap force me to upgrade the front suspension too? Yes—an extra 100+ lb-ft of torque demands heavier-duty coils, dual-rate springs, and revalved shocks to maintain calm ride quality.
Is it worth keeping original-looking hardware if I want modern performance? Yes—select kits that hide modern springs/shocks behind OEM-style components, then document the upgrade to keep the collector value high while improving the drive.
Conclusion
Ready for a daily-driver early Bronco that honors the classic while delivering modern composure? Let’s talk: asc4x4.com | (310) 396-6341